Saturday, August 29, 2015

Craftsy: Sewing designer jeans with Angela Wolf - Part 5


Now for the wool denim. This fabric is amazing! Sewing them up was a cinch, I am getting faster all the time. This is not super stretchy, so I made another pattern for mid-stretch denim. The pictures show them fresh on, and looking a bit tight, but I think the fabric will relax. No issues with fit, construction or anything! Yay!

Some whiskering, but I think these will soften. 

It is confronting to examine my own bottom. However, I am happy it is contained, and there is no gaping at the back waist. 


And some details, I love the colour! Next I will make some longer for heels and use a dark thread for top stitching.


Craftsy: Sewing designer jeans with Angela Wolf - Part 4

So onto my third pair. I have been working on a trouser pattern concept, to allow fitting of a range of sizes/body shapes, without creating either a block first, or working backwards form and existing pattern. It is still very much in the testing stage, and I have started with myself, given that my figure is super hard to fit for pants. Even harder as I am mostly trying to do it on my own! So far, it is working, and I am now going to test it on some of my super helpful students.

Here are pics of the calico toile:


Made into simple trousers:


I decided to add welt pockets for some back detail:


And adapted into a jeans style, using only the pattern shapes, rather than jeans fit:


Here are some detail pics of the construction:

 Liberty pockets again!

I have been admiring wide leg pants in denim, so I thought this foundation pattern would translate well. I am not sure they are so flattering in the straight leg, but they are comfortable. I would change the shaped waistband, it fits very snugly, but again, emphasizes the waist/hip disparity. It is very hard to fit trousers to yourself, and now I have looked at the pictures, I can see there needs to be a diagonal dart alteration through the back.

The denim is lovely and soft, but more suited to boyfriend style jeans. For my next projects I have a lovely Tencel I think would work better in this style, and for regular jeans I have a dark stretch wool/cotton which I can’t wait to try. It has minimal stretch, so I have made another pattern to account for the ease, and I hope it works.


Overall, the Angela Wolf course was very good, the videos were very clear, and she has great technique. But to get a professional finish, it comes down to the pattern, and the only way to get the fit is to test using the actual fabric. I am very impressed with the Craftsy courses, I like that you can access the videos at anytime, and they don’t seem to expire, unlike the Burda courses. And they are so much cheaper! I think I’ll be back for more!

Craftsy: Sewing designer jeans with Angela Wolf - Part 3

The adventure continues! I completed my second pair of jeans, followed quickly by another pair, but more about the third ones later. Here are some details of the construction:


 Complete with rivets

Liberty fabric for the pockets! 

Pocket detail: a sewed a 'W' for workspace

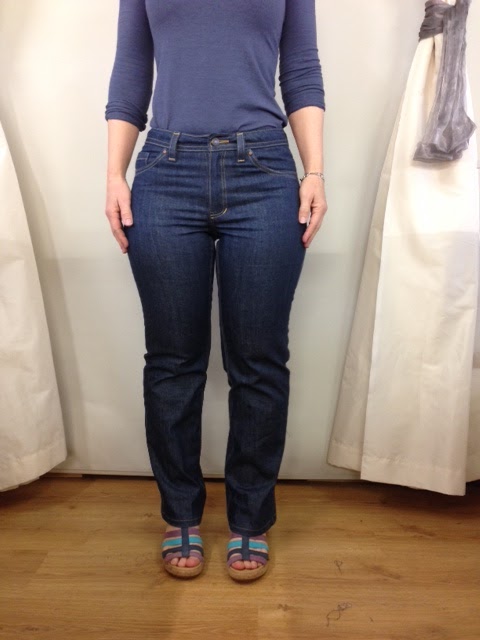
It was all going well, I put in the zip and it was very easy, and so I was feeling all smug and confident. Next I did the front pockets, and I was very happy with the look of the front. And so it went, each stage was smooth and trouble free. Until I tried them on, and the curse of the home sewer struck: I wasn’t happy with details. Ugh. I hate it when I do this to myself! The fly was too long, and I knew I wouldn’t be happy wearing them with a fly so long it looked like a willy hanging down. I am not a fan of unpicking my own work. I will happily do anyone else’s, but when it comes to my own work, I know I am faster making from scratch, so it irks me to undo anything. I tell my students unpicking is Zen. Ha! Not for me when I want a finished product! So I unpicked the fly and redid it, and was happy. It wasn’t so hard; maybe I will fix my daughters jeans after all?

 The fly after

I was so happy, I wore them to my deceased friend’s birthday at her grave (it was a lovely party, we reminisced and drank champagne and celebrated her life).

That is me in the background pouring champers. The girls are celebrating with a youth friendly option.

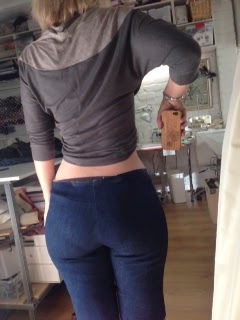
Too hasty though; I tried them on again the next day and as I examined my bottom to ensure the booty was not only contained, but also aesthetic, and I was struck by the pocket placement sitting too low down. Bugger. So I unpicked them and sewed them on again.

Before, looks Ok off, but not so nice on.


After

Satisfaction.

Or not.

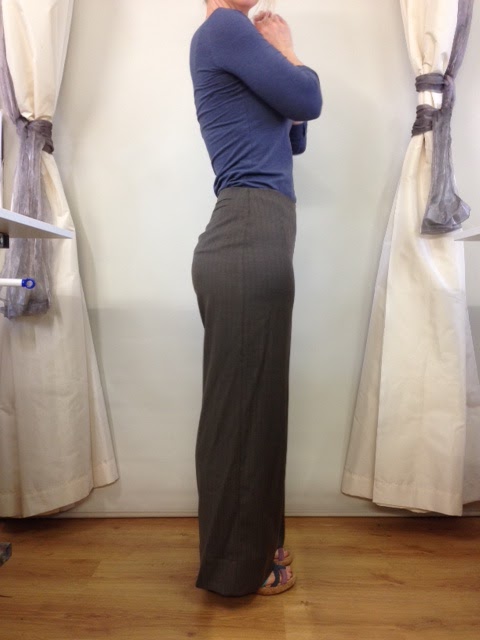
When I made the toile I added extra rise to the yoke, but I realised that given my extreme waist to hip ratio (26” waist, 42” hip) the shaping was too much, and actually, the lower rise was more flattering. The alteration needed to be along the seam of the yoke, and I sat and contemplated unpicking, again. But not this time, it would be EPIC: belt loop, waistband, centre back flat felled seam, yoke, not likely! So sewed a horizontal dart across the yoke and top stitched it to make a ‘feature’. I don’t think it screams ‘lazy alteration’, and the fit is great.


The horizontal dart

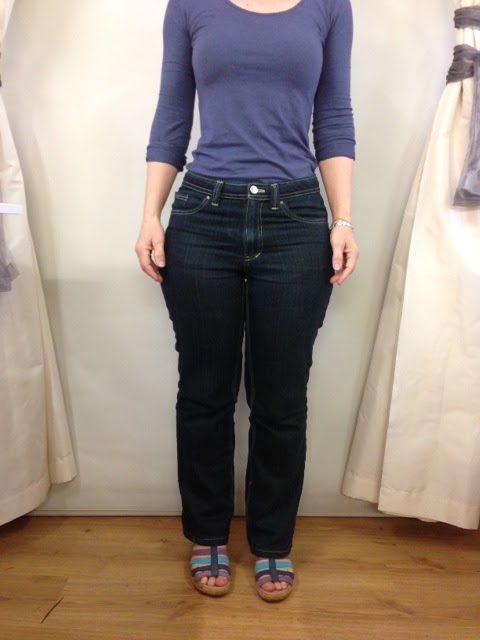
These jeans are non-stretch, and I bought the fabric based on availability, more then colour or suitability, but I actually really like the colour, and because they fit so well, the non-stretch is very comfortable and isn’t going out of shape, as happens with some stretch denim. Overall, a win!

Regarding distressing the denim, I think it needs more exploration. The denims I have tried shredded easily, rather than getting the aged effect I want. I don’t like holes in my jeans, I just want the seams softened. Angela makes it look very easy, but I suspect the denim you use is critical. I love jeans, and would happily live in them. I have been trying to move away from denim, but I can’t see that happening now, as I will be making many more – purely in the name of research, of course!

Tuesday, August 18, 2015

Craftsy: Sewing Designer Jeans with Angela Wolf - Part 2

The Designer Jeans course was great, I picked up lots of useful tips, and the distressing was great fun. Angela has a lovely way of presenting, and I raced through all her videos!

I am a big fan of toiling – or making a muslin as the Americans say- but I was super keen to try out the distressing techniques, and I had such faith in the Press’n Seal process, I just jumped straight in. The denim I bought is lovely and soft, but doesn’t distress overly well. In fact the biggest distress was my studio; it was covered in indigo dust. Note to self, do that bit outside next time. My original jeans had 2% stretch, but don’t feel ‘stretchy’, so I thought the 100% cotton demin would be fine.

I am going to post my fitting pictures as information, even though I am not wearing the best undies, and it is seriously awkward trying to photograph your own bum. Fitting pants is the hardest thing, and I really appreciate those online folk who share so much. So this is me giving back… please don't judge...

Here is a snippet of the sewing process. I set up one machine for regular sewing, another with top stitching thread, and of course, the overlocker ( I was lazy and didn't change the thread, but Angela says it is fun to use a contrast colour for overlocking, so who I am I to argue?!)


The process was logical, and from cutting out to trying on, it took about 4 hours. Not bad.


My faithful hound, Jasper, stayed with me, hovering outside the door, impervious to the dust, sandpaper and hammering.


So. They look great, I love the finish, and they don’t look homemade, but… they won’t do up! Sob! Mistake number 1: make sure the material you plan to use is the same as the original. Sewing 101 perhaps, but the shop I went to had a limited range of denim (2 rolls), and I thought it felt as though it had some give. It doesn’t.


What to do? Alter the pattern obviously, but how much? I thought about the jeans shopping process (almost as bad as shopping for bras), and how the shop girls tell you to get a tight pair as they ‘relax’. But all information I could find talked about adding ease. That didn’t sit right with me, as I wanted my jeans to be fitted, not frumpy. I might be 44, but I don’t want to look it.

The big property of denim is that it gives, so it seemed to me you had to have 0 ease, the original pair having negative ease due to the stretch factor. So I measured at intervals from my waist to hip, then around my thighs, down to my knees, separating the front measurement form the back to transfer to my pattern. I then recut the pattern and made a new pair. This time, only to the knee, with the back yoke, but no pockets. And no distressing.

Joy! They fit like a glove! Super comfy and my theory of 0 ease paid off. At this point, I added some fitting touches, which the original pair actually lack in terms of fitting me: I increased the back rise a smidge, as the original sit a bit low. Funny how you notice these things when you make your own, but overlook when buying ready-to-wear.


with the increased rise - and VPL

But what about the Press’n Seal? I couldn’t believe that it hadn’t worked! I went to a fabric shop I avoid at all costs (I get anxious even thinking about the dreadful service) as they had a great range of denim. So I sucked it up and bought some more, one of which is stretchy. Another toile, same as the second one, with very basic construction. And what do you know?! They fit perfectly! Yay! Press’n Seal is the best!


Of course, then I thought, the rise is too low, and the back does gape a bit, so I made those alterations, and they are cut out, ready to be made up!

Stay tuned!